Home/Flooring & Interior Updates/Crown Molding Installation
Go2you Construction LLC
Crown molding installation in Clarksville, TN
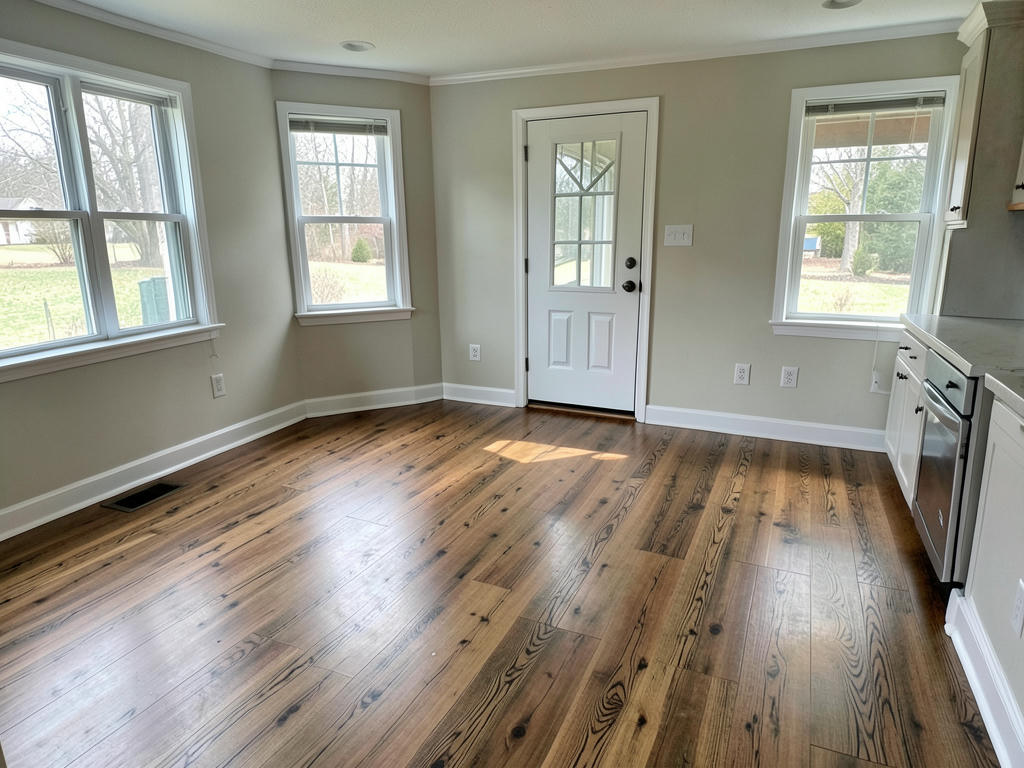
A finished transition from wall to ceiling
We provide crown molding installation in Clarksville, TN, fitting trim to your room's corners, ceiling lines, and existing woodwork. We help you choose a profile that belongs in the space, then handle the cuts, fastening, and finishing details.
Crown molding installation in Clarksville homes
Crown molding defines the meeting point between your walls and ceiling without changing the room's layout. We use it to give a plain room a more deliberate finish or connect new work with existing architectural details. During the first visit, we look at ceiling height, door and window trim, cabinet placement, and the rooms visible from adjoining spaces. Those relationships help us recommend a molding size that feels balanced rather than oversized or barely noticeable. We also discuss whether you want one room finished or a consistent treatment across several rooms.
We evaluate the wall and ceiling surfaces before settling on the installation scope. Small irregularities can often be accommodated while fitting the molding, but loose material, significant damage, or pronounced waves need separate attention. Crown can cover the wall-to-ceiling joint; it cannot correct movement or a failing surface beneath it. When drywall repair and installation needs to happen first, we explain how that changes the sequence. We also identify corners, short returns, and stopping points so you understand how the finished trim will meet each opening.
Which crown molding material fits your room?
We help you choose molding by balancing appearance, room conditions, and the finish you want. Paint-grade wood offers crisp profiles and can be worked to fit irregular corners, but knots and grain may need extra preparation. MDF generally offers a smooth painted surface and consistent profiles, though ordinary MDF is not a good match for repeated moisture exposure. Stain-grade wood keeps the grain visible, making species, color variation, and joint placement more important. We explain these differences using your room and existing trim rather than treating every material as interchangeable.
Profile size matters as much as material. We compare simpler shapes with more detailed profiles and look at how each relates to ceiling height and nearby casings. A built-up design can create greater depth, but it also adds pieces, joints, and installation steps. We discuss painted versus stained finishes and clarify the finishing work included in your scope. If broader interior trim installation is part of your update, we coordinate the visual weight of the pieces. The goal is a room that feels consistent without requiring every trim profile to be identical.
How do we fit crown molding to uneven corners?
We fit crown molding to the angles in your room rather than assuming every corner is square. Inside corners often benefit from a coped joint, where one piece follows the profile of the adjoining piece. Outside corners require carefully fitted miters because both faces remain visible. Long runs may need spliced joints positioned with support and sightlines in mind. We assess these details before cutting so the layout does not leave an awkward short piece near a prominent doorway or place an unnecessary joint in the most noticeable part of the room.
We also look for suitable fastening points and determine whether the selected profile needs additional backing. Crown bridges two surfaces at an angle, so secure attachment matters more than simply hiding nail heads. Where walls or ceilings vary, we balance the molding's alignment with the surrounding room instead of forcing it to trace every dip. Small finish gaps can be treated appropriately for the selected material, but filler is not a substitute for a properly fitted joint. Stained molding leaves less room to conceal adjustments, which makes fitting and material selection especially important.
What affects the scope and timing of installation?
The room's shape and finish requirements affect the work more than the room count alone. Multiple outside corners, angled walls, tall ceilings, stairs, and interrupted runs add fitting or access work. Removing old molding can also expose paint ridges or damaged drywall that were hidden during the initial visit. We explain those possibilities when discussing the scope and address uncovered conditions before covering them. A single simple profile involves fewer steps than a built-up assembly, while a stain-grade installation usually requires closer attention to grain, color, and visible joints.
Finishing can affect the schedule even after the molding is attached. Filling, caulking where appropriate, priming, and painting involve separate steps, and some materials need drying time between them. We clarify which of those tasks are included rather than leaving you to guess what installation means. When crown is part of broader flooring and interior updates, we discuss the order of work so later tasks do not unnecessarily disturb finished surfaces. We establish timing around the agreed scope instead of promising the same turnaround for every room.
How does a crown molding job go with us?
We begin by discussing the rooms you want finished, the look you prefer, and any trim you want to keep. Reviewing surfaces, access, profile options, and the intended finish helps define the work. Once the scope is agreed on, we discuss room access and protection for nearby surfaces. You can get ready by clearing small belongings, moving furniture away from the walls where practical, and keeping pets out of the work area. We talk through larger pieces that may need to remain so access is addressed before installation begins.
During installation, we lay out the runs, fit the joints, and secure the molding before moving through the agreed finishing steps. We pay attention to transitions around openings and how joints look from normal viewing positions, not just from directly beneath the trim. Cleanup involves removing installation debris and reviewing the completed scope. Homeowners searching for crown molding installation near me can call us to discuss a room or a larger update. We serve Clarksville and the listed surrounding communities, including Sango and Woodlawn, and can discuss your location when you contact us.
Questions
Questions about crown molding in Clarksville
Can you install crown molding if my walls are not straight?
We can often accommodate minor wall and ceiling irregularities, but substantial defects may need repair first. We assess how much variation exists and explain where fitting adjustments will work. Forcing molding tightly against every uneven spot can create a visibly wavy run, so we balance alignment with the condition of the surrounding surfaces.
Can crown molding match my existing trim?
We can help select a compatible profile, though an exact match depends on the availability and condition of the original molding. We compare the shape, projection, and finish with what is already in your home. If an exact match is unavailable, we discuss a complementary profile or a defined transition between rooms.
Is crown molding suitable for a bathroom?
Crown molding can suit a bathroom when the material and finish are appropriate for the room's moisture exposure. We discuss ventilation, proximity to wet areas, and material limitations before recommending an option. Ordinary MDF is vulnerable to moisture damage, and decorative trim should not be treated as a remedy for persistent dampness.
Does crown molding installation include painting?
Painting is included only when it is part of the agreed scope. We clarify whether the work ends at installation, paint preparation, or a completed finish before the job begins. That discussion also covers nail holes, appropriate joint treatment, and any adjacent wall or ceiling touch-up needed after old molding is removed.
Do I need to leave home during installation?
You do not necessarily need to leave home, but the work area needs to remain clear while we are cutting, fitting, and fastening trim. We discuss access and room use with you before work begins. Keeping pets and children away from the active area helps separate everyday household activity from tools, materials, and installation debris.